Deploying Rock Solid Applications with Kubernetes
This article was originally published on the Manifold blog

In a previous blog post, we described how we set up our Kubernetes cluster. We also went over the initial configuration to support our applications. Now that we have our cluster up and running, it’s time to start deploying these applications.
In this blog post, we’ll look at some changes we made at the application level.
Health checks
Migrating to Kubernetes gave us opportunity to set up liveness and readiness probes. The readiness checks are useful if your application needs to do some bootstrapping. The liveness checks are especially useful for long running services.
To simplify this, we created the healthz package. We hooked this into our framework, enabling this by default for all our services and workers.
Caveat: Circular Dependencies
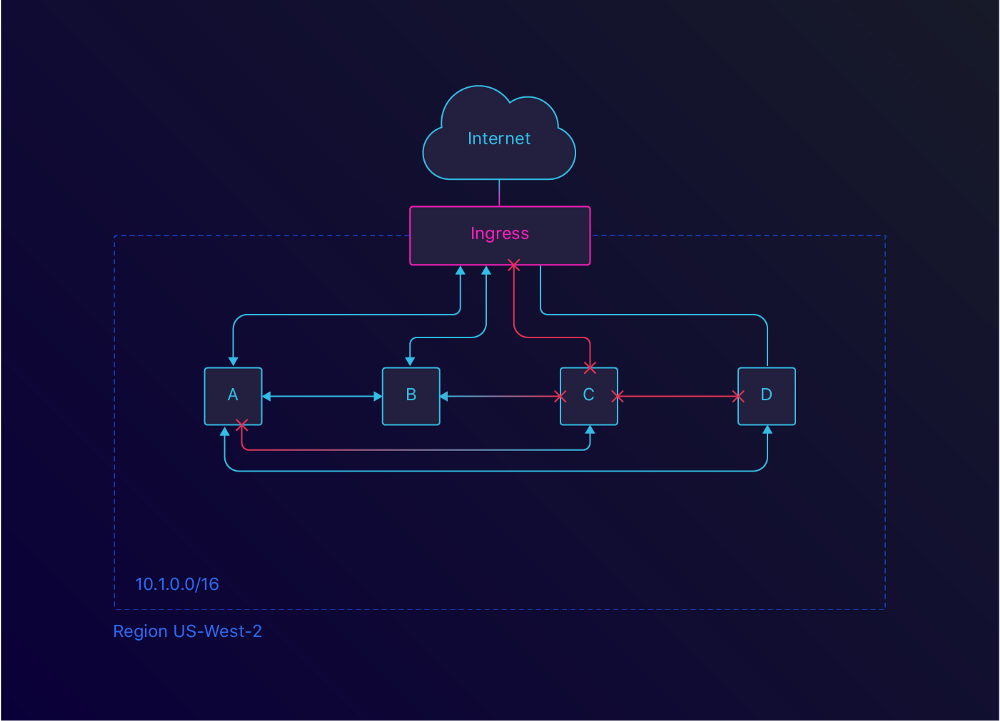
When a service speaks to another service, it’s sensible to set up a check for this. This comes with the risk of building a Circular Dependency. When this occurs, you could face a complete cluster outage which is hard to recover from. To mitigate this, use the “Degraded” status. This can let you know that there is an issue, but won’t mark your service unavailable.
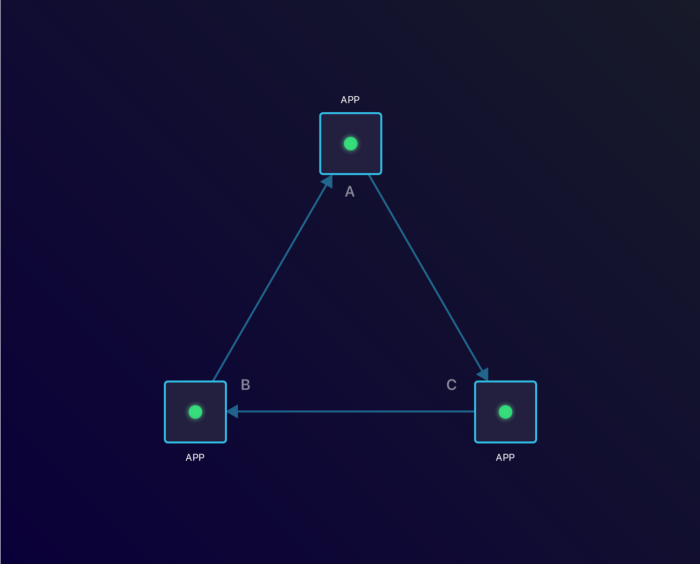 3 applications which depend on each other
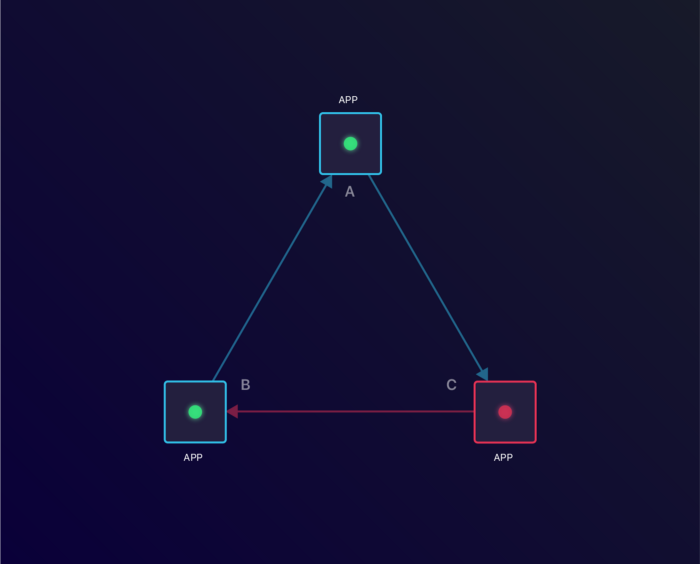 Outage in Application C
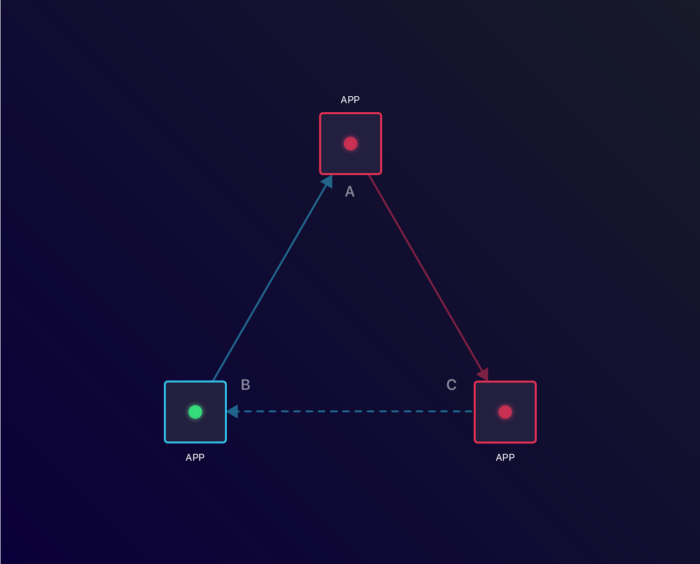 Due to the Application C dependency in Application A, Application A becomes unavailable
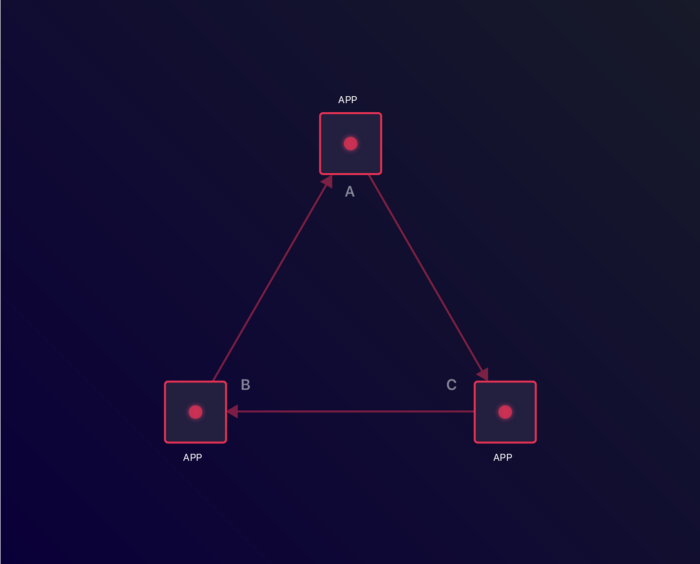 Application A is now unavailable, making Application B unavailable. None of the apps can reboot.
Securing Docker Images
Whilst migrating over, we also decided to increase the security of our Docker Images. We did this by ensuring our containers were running unprivileged.
To go a step further, we also looked into setting up Pod Security Policies in Kubernetes. With these policies in place, we’d enforce users to run their containers as non-root users. Sadly, we didn’t manage to get the Admission Controller working yet. We didn’t have this enforcement in our legacy setup, so we agreed to postpone this.
PS: Google have announced support for this on their Kubernetes Engine.
Network Policies
Some services should only receive requests from a select group of sources. Your log aggregator doesn’t need to speak to your user service. This is where Network Policies come into play.
By default, none of our services are available from outside the cluster. The only way to speak to one of these services is through our Nginx Ingress.
Within our own application network, we’ve set up a rule so that all services can speak to each other. For this, we labeled each application with a component label, like component: marketplace. Now we can set up a selector for this specific component.
By adding service labels, you can also create more fine-grained policies. One of these policies could be to only allow traffic to your money service from your billing service.
 We can restrict Ingress and Egress traffic as well as inter-application traffic with Network Policies.
Tolerating Node Failure
In our previous blog post, we looked at how we can set up High Availability (HA) for our instances. This does not translate in ensuring that our applications run in a HA fashion.
Scheduling
First, you’ll want to run multiple replicas of your Kubernetes Deployment. This will ensure that when one of replicas fails, the others can still serve traffic. A new healthy replica will then replace the unhealthy one.
The most common setup is having several Availability Zones. Each Availability Zone then has a set of nodes as well. In an ideal scenario, replicas are spread across these instances.
By using Deployment Affinity, we can exactly do that. We can ask the Kubernetes Scheduler to look for instances where this type of service isn’t running yet. We can also ask to find an Availability Zone where this service isn’t active yet. Kubernetes will then decide on a node and deploy the application there.
You can see a full example here:
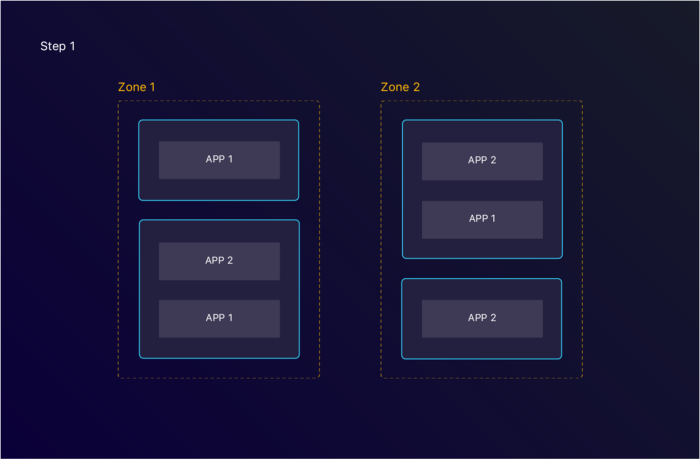 2 different applications are deployed across different zones and nodes
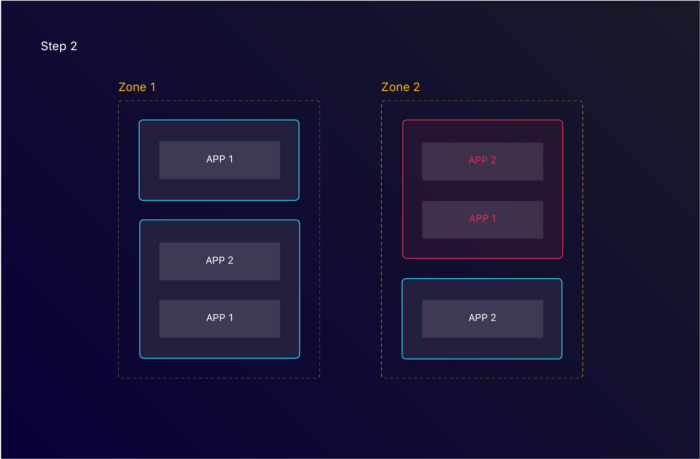 One of the nodes becomes unavailable, marking all the applications within unhealthy.
 The unhealthy applications are rescheduled on healthy nodes.
By configuring this, you lower the chances of scheduling pods on the same instance. This in turn increases your availability. We’ve configured our cluster to use the preferedDuringScheduling stanza. This tells Kubernetes to try and do this, but don’t enforce it in case there is no instance available which meets the requirements.
Rescheduling
Kubernetes makes the decision of where to launch your pod when it sees the pod for the first time. As described above, we can also put some constraints on this.
Seeing that a cluster is dynamic — pods come and go — and scheduling is static, these constraints could get violated over time. This could for example be due to a lack of resources on other instances or due to instance failure.
We resolved this by installing a Descheduler into our cluster. This can do several things. One of them is making sure the load across instances is within a given range. The other is Descheduling pods that violate their affinity rules.
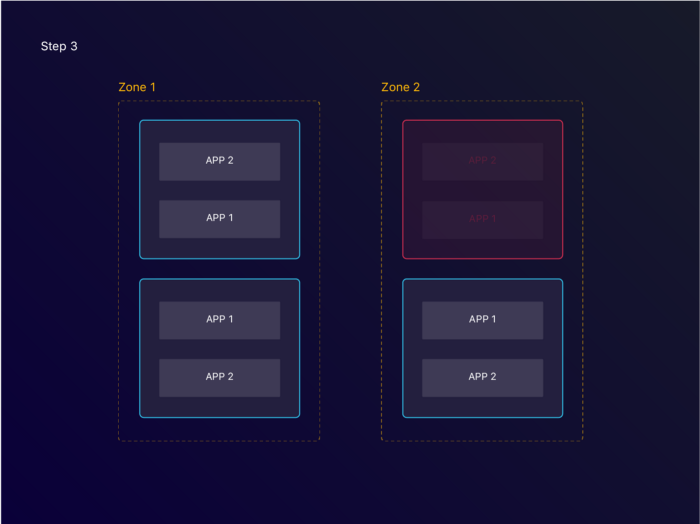
This is what it looks like if we continue our previous example:
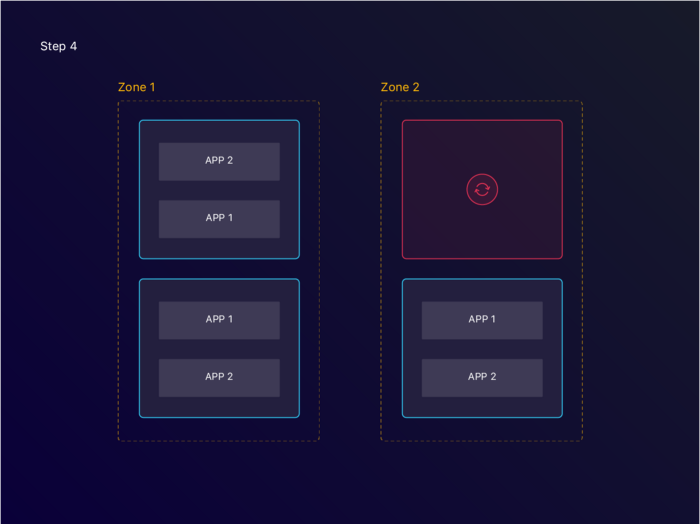 The AutoScaling Group creates a new instance
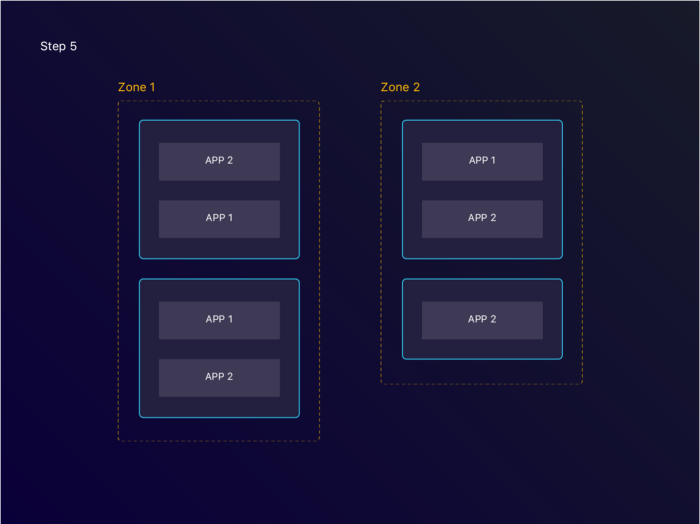 Once the new node becomes available, apps get rescheduled on the new node.
An important thing to take note off is that the Descheduler respects PodDisruptionBudgets. If not configured, all replicas of a specific Deployment could get descheduled at the same time. This could lead to unexpected service outage.
Conclusion
Kubernetes does a great job right off the shelf. It does however need some help to make it aware of your application setup. Once you know this, you’ll be able to use a set of powerful tools:
To make this easier, we started building Heighliner. It will set up a bunch of sensible defaults for you. If you then want to, you can overwrite these.